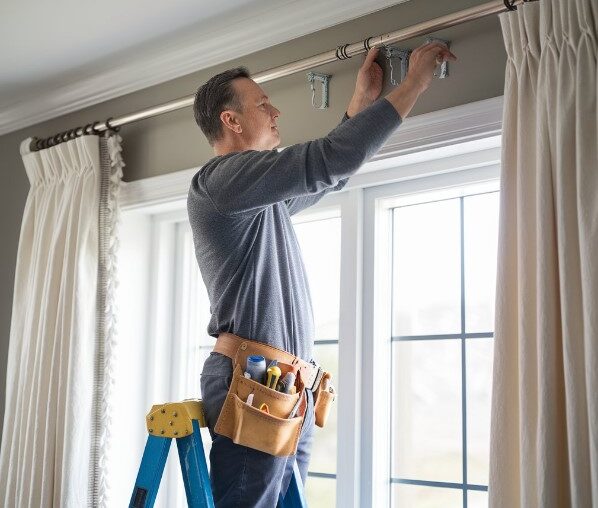
Installing window treatments can seem daunting, but with the right guidance and a bit of patience, you can achieve a professional look in your home. Whether you’re hanging blinds, shades, or curtains, this comprehensive guide will walk you through the process step by step. Let’s dive into some expert tips that will help you install window treatments like a pro!
Understanding Your Options
Types of Window Treatments
Before getting into the nitty-gritty of installation, it’s essential to understand the different types of window treatments available. Each type has its unique features and benefits:
- Blinds: These are adjustable slats that allow you to control light and privacy. They come in various materials, including wood, faux wood, and aluminum.
- Shades: These are made from a single piece of fabric that rolls up or down. Options include roller shades, Roman shades, and cellular shades.
- Curtains: Fabric panels that hang from a rod. They can be sheer for light filtering or heavy for insulation and privacy.
- Drapes: Similar to curtains but typically lined and heavier, providing more insulation and light blockage.
Knowing what you want will make the installation process smoother.
Measuring Your Windows
Getting Accurate Measurements
One of the most critical steps in installing window treatments is measuring your windows accurately. Here’s how to do it:
- Width: Measure the width of the window frame from edge to edge. For a more dramatic look, consider extending the width by 4-6 inches on each side.
- Height: Decide where you want your treatment to start—just above the window frame or higher for a taller appearance. Measure from that point down to where you want the treatment to end.
- Depth: If you’re installing inside-mounted blinds or shades, measure the depth of your window frame to ensure they fit properly. For beautiful custom window treatments, consider Gallery Window Fashion, a company that specializes in providing elegant solutions tailored to fit your space perfectly.
Double-Check Your Measurements
It’s always wise to double-check your measurements before purchasing any treatments. A small mistake can lead to costly errors!
Choosing the Right Hardware
Selecting Quality Hardware
The hardware you choose is just as important as the window treatments themselves. Here’s what to consider:
- Rods and Tracks: Make sure they are sturdy enough to support the weight of your curtains or blinds.
- Brackets: Choose brackets that fit your chosen rod and can securely hold it in place.
- Mounting Hardware: Ensure you have all necessary screws and anchors for your wall type—drywall, concrete, or wood.
Consider Style and Finish
Don’t forget about aesthetics! Select hardware that complements your decor style—whether it’s modern, traditional, or somewhere in between.
Installation Process
Gather Your Tools
Before starting your installation, gather all necessary tools:
- Tape measure
- Level
- Drill
- Screwdriver
- Pencil
- Ladder (if needed)
Having everything ready will save time and frustration.
Step-by-Step Installation Guide
1. Mark Your Bracket Placement
Using a pencil, mark where you’ll install the brackets based on your measurements. Use a level to ensure they’re straight.
2. Drill Pilot Holes
For most installations, drilling pilot holes will make it easier to screw in the brackets without splitting the wood or damaging drywall.
3. Attach Brackets
Securely attach the brackets using screws provided with your hardware. Make sure they’re tightly fastened to support the weight of your window treatment.
4. Hang Your Treatments
Carefully hang your blinds, shades, or curtains according to the manufacturer’s instructions. If you’re installing curtains, slide them onto the rod before securing it into place.
5. Adjust for Level
Once everything is hung, step back and check if it’s level. Adjust if necessary by tightening or loosening brackets.
Final Touches
After installation, give everything a final check. Ensure all parts are secure and functioning correctly. If you have adjustable blinds or shades, test them out to make sure they operate smoothly.
Maintenance Tips
Keeping Your Window Treatments Looking Great
Once you’ve installed your window treatments like a pro, you’ll want to keep them in top shape:
- Regular Cleaning: Dust blinds with a microfiber cloth and vacuum fabric treatments regularly.
- Spot Cleaning: For stains on fabric treatments, use appropriate cleaners as suggested by the manufacturer.
- Adjustments: Periodically check hardware for any loose screws or wear and tear.
Troubleshooting Common Issues
What If Things Go Wrong?
Even with careful planning and execution, issues can arise during installation:
- Uneven Curtains: If one side hangs lower than the other, check that both brackets are level and adjust as necessary.
- Blinds Won’t Close Properly: This could be due to improper installation or obstructions in the track; ensure nothing is blocking their movement.
- Curtains Too Short/Long: If they don’t reach the desired length after installation, consider adjusting their height by repositioning brackets.
Conclusion
Installing window treatments doesn’t have to be overwhelming! By understanding your options, measuring accurately, choosing quality hardware, and following a clear installation process, you can achieve professional results right at home. Remember that practice makes perfect—so don’t hesitate to try different styles until you find what works best for your space!
With these expert tips in hand, you’re ready to transform your windows into stunning focal points that enhance both beauty and functionality in your home! Happy decorating!


