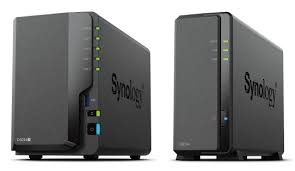
The memory is pretty important part of the daily life of user, which uses to carry data. To make it safe and save which you can do with the help of Synology NAS.
Here, you will get to know how to assemble and connect the Synology NAS device to your home router and computer with the help of find Synology interface.
Assembling Synology NAS Device
You have to insert the Synology drives in NAS device. The NAS device consists of memory plates, hard drives, cables, and some more components to complete the device. Let’s see how to construct the device;
- Place the Synology device near to your WiFi router device.
- Now, use the user manual and take out the data drives from the content package.
- Insert the drives in to the drive trays and insert them in to the Synology box.
- You have to lock them properly with the help of the drive tray keys.
- After locking drives and assembling the parts of the device, you have to connect it with the WiFi router.
Connecting Synology to Router
The NAS device connects with the router with the help of the Ethernet cable. Just follow some steps to make a connection;
- The Ethernet cable must be in good condition and not damaged or cut.
- Connect it to the Synology NAS Ethernet port.
- Then, connect other end of the cable to the router LAN port.
- Make sure that the cable connection is tight and running.
- Now, it is time to power on the router and Synology NAS device.
- Connect power cord to the power port to the NAS and plug the adaptor to wall socket.
After powering on the devices, you have to connect the device with your computer. To do that, you have to link your computer or laptop to the same router network which is connected to the Synology device.
Connecting Synology to Computer
- Now, you have to open up the Web browser in your computer.
- Search the Synology NAS login URL that is find.synology.com in browser.
- The interface window will open up, where you have to select the Synology model.
- At the bottom of the screen you will find a button of Connect written on it.
- Just click on it and you will successfully connect with the Synology cloud or NAS device.
Here, you can easily download any software like Synology QuickConnect, DSM and many more.
Let’s see some solutions and troubleshooting tips, which will help you to make the router to NAS and computer to NAS connection strong and secure.
Troubleshooting Tips
Check Router Connection
Check the Synology is connected to router or modem or not via Ethernet cable. If the network is down, then connect the Synology device again to the Home WiFi network.
Check Ethernet Cable
Make sure that the Ethernet cable that you are using to connect is in good condition and not damaged or it is not cut from anywhere. If any are cuts on the cable seen, then replace the cable with a new.
Reboot WiFi
Other troubleshooting tip is restarting the Synology device. There simple steps given below;
- Find the power button on the device and press it twice to reboot the device.
- Plug NAS device power adaptor out from the wall socket, and then plug it in again.
Reset WiFi
You should also try resetting the NAS by following some of the steps written down here;
- Find and press the reset button for 5-10 second if the reset is not started.
- The reset button can be pressed using a pin or sharp object or a pen.
After resetting the device, connect the device to the computer again and update it by using the Synology Download Center.
The End Note
Here, you have seen and learned how to assemble and connect the Synology NAS device to your home router and computer with the help of some instructions.


